Recycled longies (wool or fleece) tutorial December 2, 2009
Posted by Judy in EC adventures, Sewing projects, Tutorials.trackback
Since I’ve decided to go CD full-time, I’ve realized that wool longies and shorties are definitely necessary. Although there are several good tutorials already online, I couldn’t find one that did quite what I wanted: shorties/longies that weren’t skin tight and that looked like real pants. Most of what I found gave directions for making longies out of the sleeves . . . . but then what happens to the rest of the wool from the sweater? You could make a butt sweater or butt sweater longies, but as I mentioned before, I wanted mine to look like actual pants. Sooo, here’s my version: shorties/longies with a good amount of ease that look like actual shorts/pants and use the non-sleeve parts of wool sweaters!

This particular tutorial is for shorties made from felted wool, but you can use all of the same basic formulas to make longies as well. Plus, this can be used to make shorties/longies out of fleece. I like to tighten up the measurements a bit for the wool, but you can experiment to see what works for you and your LO.![]()
The trickiest part is drafting the pattern, the actual sewing is pretty much a snap. So once you get the pattern to where you like it, you’ll be churning these babies out like mad!
Sorry for the continuity issues, these pics are from four different longies!
Materials needed
- paper bag or something else on which to draw your pattern
- measuring device
- ruler (I use a quilter’s rule so I get measuring device and ruler all in one)
- pen
- scissors
- thread
- size 14 needle
- ¾ inch elastic

- I realize this is a teddy bear, but LO is napping, and if he weren’t he would be running too fast to get a measurement AND a picture of said measurement!! Note that I start measuring halfway between the back and the belly.

E = hips at widest part – measured in back from left hip to right hip
F = waist – measured at belly button level
G = back ease
H = front ease (you decide how much ease you want. I don’t like the shorties/longies to be skin tight!)
S = seam allowance (I go with ¼ to save on fabric and bulk)
Drafting the pattern
1. Get a pair of pants that fits your LO well. Place one of the legs on your paper and trace. This is going to be the front of the shorties. (I just use this as a guideline so I don’t have to freehand it. Pretty much, you just need a good-sized rectangle.)
2. Measuring from the bottom, draw the crotch line (A) and mark a dot on the right side.
3. Measuring from the crotch line, mark the waist line (formula = B – 2), also on the right side. (These 2 inches will be made up with the waistband.)
4. Measuring from the left, mark the hip width at the waist line using this formula: D/2.
5. Now you want to draw the crotch curve line, starting at the waistline and ending at the crotch line. I usually make a pretty deep curve to account for the giant diaper =) (This sound trickier than it actually is. The pic below should make it clearer.)
6. Mark the cutting line by drawing a line 1/4 inch above the waist line. (This will be the seam allowance for the waistband.)
7. Now you need to add ease and seam allowance to the front of the pattern using this formula: (H/2) + S. (This ended up being 3/4 inch for me.) NOTE: This is important, only add this ease to the sides (the vertical lines). The horizontal lines (waist line and crotch line) should only have the seam allowance added. Clear as mud? Maybe the pic will clarify.
Here’s what you should have so far.

8. Now draw another rectangle for the back of the shorties (or just turn the pant leg over and trace.)
9. Measuring from the bottom, draw the crotch line (A) and mark a dot on the left side.
10. Measuring from the crotch line, mark the waist line (formula = C – 2), also on the left side. (Again, the 2 inches will be made up by the waistband.)
11. Measuring from the right, mark the hip width at the waist line using this formula: E/2
12. Again, you’ll want to draw a pretty deep the back crotch curve line, starting at the waistline and ending at the crotch line.
13. Mark the cutting line by drawing a line 1/4 inch above the waist line. (This will be the seam allowance for the waistband.)
14. If your LO has a larger rise in the back than front, you’ll need to true up the cutting line. (This will probably apply to most babies as cloth dipes create cute little bubble butts!) I just draw a diagonal line that connects the two, no real measuring.

15. Add ease and seam allowance to the back of the pattern using this formula: (G/2) + S. (This ended up being 1.25 inches for me.) Again, only add the ease to the vertical lines.
16. You’ll want to fold the pattern and make sure the crotch curves basically line up. Trim as needed.
Here’s the completed pattern.

Before cutting out the fabric, I usually “prepare” the wool. So I’ll cut off the sleeves and cut along the seams so I have an “open” and “flat’ piece of wool. If the wool sweater happens to button in front (instead of being a pull-over), I just leave it, but will trim off the seam so it’s not so bulky.
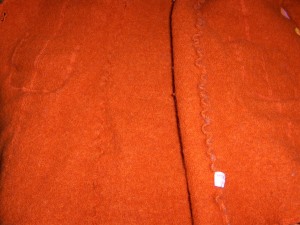
- the removed seam is on the left – might need to click to see it better

If you get carried away with the trimming and end up with some holes, not to worry. A quick whipstitching will solve the problem.

Now it’s time to sew the shorties. All seam allowances are ¼ inch.
NOTE: I didn’t bother to serge any of the raw edges. Wool doesn’t tend to ravel, so I just skip that step. If you want to serge, I would do it right after cutting the wool.
Sewing the pants
1. Place the pattern on the wool and cut out. You can either place the pattern on the right side of the wool or on the wrong side. I placed it on the right side for this example.
2. When you cut out the second piece, make sure to flip the pattern over, otherwise it won’t work out like you planned!

- pattern right side up


- pattern flipped

Here is another way to lay out the pattern.

- Here I just laid the pattern on the sweater without any “preparing”. That way, I only had to cut it out once.
3. Fold the wool, right sides together (RST) and sew inseam. (from the bottom to the crotch line.) Do this for both sides.
4. To sew the crotch seam: turn one leg right side out and insert it into the other leg (which should be wrong side out). This way, you’ll have the right sides together. Be sure that the two fronts are together and the two backs. (This might seem obvious, but I’ve been known to goof up and then I ended up with something totally not right!!)
5. Pin and then sew the seam. I like to go back and reinforce the crotch, just for good measure.
Here’s what you have once the inseam and crotch seams are sewn.


6. Now you are ready to make the waistband. The length of the waistband is determined by the hip measurement (D). It needs to be D + several inches of ease, otherwise you’ll never be able to get the pants on over the diaper. My piece ended up being 4 inches tall by 23 inches wide.
7. Fold in half, RST, hamburger-wise and sew with a 1/4 inch seam allowance.

8. Now fold the waistband wrong sides together and set aside while you cut the elastic. I usually cut mine about 1 1/2 inches smaller than LO’s waist measurement. In this case, I cut a 16 inch piece (17.5 waist – 1.5 = 16)

9. Sew the ends of the elastic together, (My machine has an elastic joining stitch, AKA, multiple-step box stitch.) then insert it into the folded waist band. I like to pin it to make sure it stays in place and to make sure it doesn’t get in the way when sewng. Wouldn’t do you any good to sew the elastic down, now would it=)


10. Next you need to sew darts in the waist of the pants so that the waistband will fit. Measure the circumference of the pants at the waist, this is T. Take T – the length of the band – 2(seam allowance) = amount of fabric that needs to be “darted”. (Here’s how mine worked out: 2 6- 23 – 2(1/4) = 2.5)
Each dart will be 2 inches long and between 3/4 and 1 1/4 inches wide at the top. In my example, then, I would need 2 darts.
11. Mark, pin and sew the darts. Here’s how I pin them.

- The white pin shows the width of the dart while the greenish pin shows the length
12. If I’m using thick wool, I like to cut the darts open and tack them down as this reduces bulk in the seam allowance for the waistband. With thinner wool. I just press the darts toward the center.

13. Now it’s time to sew the waistband onto the pants. Using pins, mark the waistband and the pants in quarters. With the pants turned right side out, line up the waistband pins with the pants pins.

14. Starting at one pin, stretch the waistband and sew. Keep doing this till you get all the way around.
15. Now fold up the waistband, pat yourself on the back and admire your new longies/shorties!

You make it look easy!
How many have you made?
Love you
Atic
May I link to your pattern on my baby registry blog? I’d like to request homemade longies as baby shower gifts, and your tutorial seems very clear.
Sure! Link away . . .. glad you like the tute=)
[…] one more pattern for making wool longies from “recycled” wool sweaters Leave a […]
These are cute ideas. It seems like there are so many things to remember to add to your baby registry. Gosh better keep a list.