The path of least resistance June 12, 2015
Posted by Judy in Sewing projects.Tags: breast cancer, decisions, fibroid, healthcare, uterus
3 comments
I’ve always been fascinated with the way water moves. It just flows and bubbles and gurgles along, generally taking the path of least resistance. I sort of think of water as being practical, not working too hard to break through dams and blockages. Instead, it just meanders to another spot where there is less resistance and keeps on flowing.
My healthcare for the past 18 months hasn’t been very practical, taken the path of most resistance. (Is that even a saying? Probably not. I think I just made that up!) That’s going to change next week, though. Next week, I’m taking the path of least resistance. Some of you have asked what I’ve decided to do about the impressively large fibroid that’s taken up residence.
I’m taking the path of least resistance.
While a full blown hysterectomy would take care of the fibroid, it would also wreak all sorts of havoc, upsetting the applecart, forcing me to amend my plans. And I have plans for this summer. Plans to paint and build and design and garden and customize our house. Plans that I’ve been working on for five months. I’m not willing to give up those plans or put them on hold. “But wait,” you say, “why can’t you just do the surgery after your plans have come to fruition?”
Because I’m taking the path of least resistance.
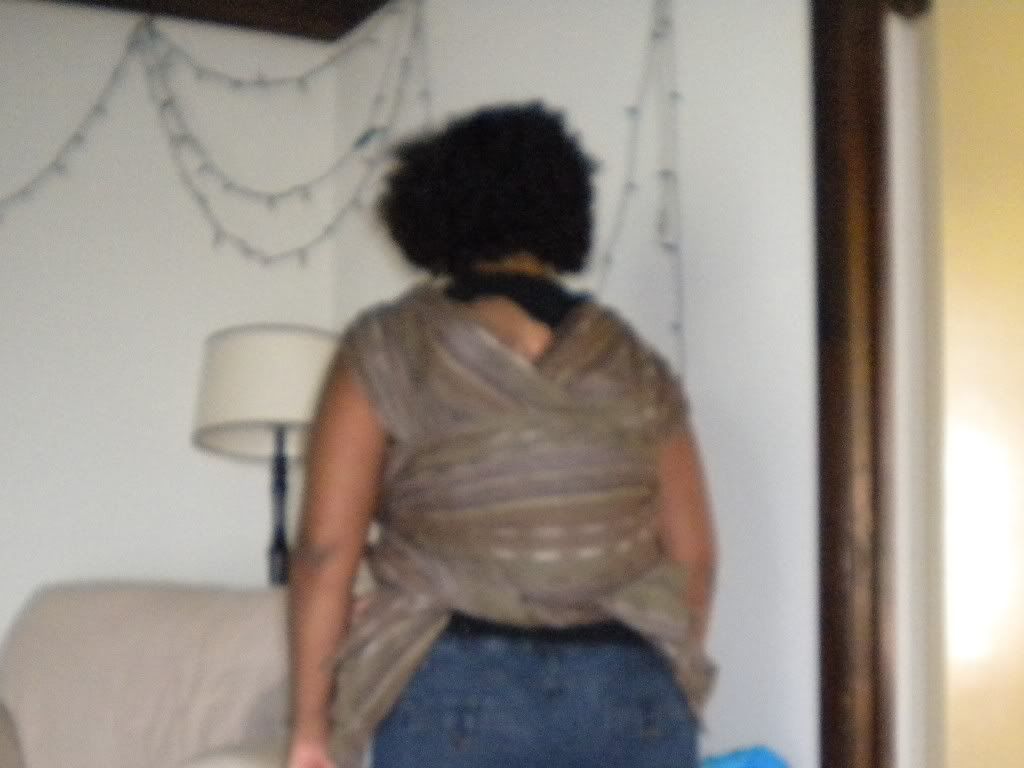
Having the big surgery would mean weeks of recovery. Weeks of being unable to do projects with the babes. Weeks of being “not quite myself”. Weeks of not being able to wear the 2.5 year old. And yes, I still wear my youngest in a baby carrier. I hear the words, “Mommy, be carrier with you.” every. single. day. I sort of thought we’d be done with the daily wearing by this point, but the Little Boss doesn’t agree. He’s always been my super velcro baby supreme, so I shouldn’t be surprised. He has, however, been extra clingy the past few months and most of the time, I’m the only one that is good enough. It’s exhausting, but sweet all at once. It’s pretty clear to me that babywearing is still important for him. In many ways, I think it’s more important to him than nursing was. I’m not willing to take that away from him. While he was a trooper with the speed weaning, I’m not sure he’d fare as well with a sudden moratorium on being worn in a carrier.
Hence, I’m taking the path of least resistance.
Having major surgery would be another big change to add to the big changes resulting from the past 18 months. The difference here is that this change isn’t strictly necessary. I’m not going to die if I don’t have a hysterectomy. Death could have been a very real possibility, however, if I had chosen to not have breast surgery. Whether or not to have surgery was a decision that had to be made “right now or else”. The pressure to make the correct decision was huge, yet I only had a short amount of time to contemplate the options. The pressure to deal with the fibroid was also huge, until I realized that it was self-imposed. Now that I’ve stepped back, I see that this isn’t a decision that has to be made immediately. It isn’t a life or death decision . For the first time in over a year, I have full control over the when and how of my heath. That realization is empowering.
And so, I’m taking the path of least resistance.
Having the fibroid embolized will likely not be a panacea. I’m okay with that. My hope is that the embolization will buy me time. It will be a stop gap measure to get me through this summer. To get me through to the end of the Little Boss’s babywearing days. To get me through a year of relatively good health. (I say a year since I’ll be revisiting the “to operate or not” issue again next summer.)
But for now, I’m taking the path of least resistance.
Next Wednesday is probably going to be awful. The doctor made it very clear that this will be painful, but only for a day or two. I can handle that. I mean, come on, I’ve given birth to four babies, this can’t be worse than that, right?
I’ll just meander on over and take the path of least resistance.
Ports and stuff April 30, 2014
Posted by Judy in Sewing projects.1 comment so far
Everyone should get a port. Seriously. They are awesome! Okay, maybe not everyone. Maybe just the people who have to get blood drawn often or get IV’s done often. Ports are soooo much better than IV’s! You do have to have the port inserted, but once that is done, it’s smooth sailing.
So a port is basically a metal device that is surgically inserted under the skin and is connected to a major vein (subclavian or jugular) via a catheter (a small tube). The port looks like this:

The metal roundish portion goes under the skin. The triangular looking thing with the needle poking out is used to access the port and is how medication is administered and blood is drawn.
And this is what it looks like inserted. It’s like a bump under the skin.

The top is made of self-healing rubber, and it’s where the needle is inserted. The bottom portion is made of a metal (titanium or stainless steel) and it ensures that the needle doesn’t go sailing through the vein. Ports can be used for all sorts of things (delivering medicine, drawing blood, administering contrast dyes, etc.) In my case, it’s being used to deliver the chemo and to draw blood.
But back to why it’s awesome. It’s virtually pain free, at least for me it has been. There’s no fishing around with a needle trying to find a vein. There’s no pain associated with the IV insertion. No irritation or pulling on the IV insertion site. If you are going to have several things done in one day, you just access the port, and you can leave it accessed until everything is done. Accessing means the needle is inserted and the vein can now be accessed. This is what an accessed port looks like:

(The blue thing is where the syringe attaches.)
Anyway, so ports are awesome! And now on to the “stuff”. Today is chemo #2. The first chemo went really well and I didn’t feel terrible. There were maybe two days where I felt not great, but the rest were remarkably smooth. In talking with the medical oncologist today, he seemed to think this was a good sign and that I would likely do pretty well with subsequent infusions. The tiredness will continue to get worse, but he didn’t think I would suddenly get slammed with nausea. Hooray for that! He WAS surprised at how great my bloodwork looked. If you’ll recall, my hemoglobin was way low right after the second surgery. It was only 8 and as such, I had to take iron pills for a month. Well, as of yesterday, my hemoglobin is back up to 11, which is apparently a huge improvement. So huge, in fact, that the doctor wondered if I’d gotten a blood transfusion! Hooray body for boosting that number back up. Go team!
The one bit of news that was weird and disconcerting was regarding weight gain. I’d already read that breast cancer patients tended to gain weight on chemo, and had already started to see some of that. I wasn’t sure if the weight gain was still part of the “I’m no longer breast-feeding and haven’t figured out how to modify my food intake so I’ve managed to gain 10 pounds in 2 months” regime. Now I know that it’s chemo-related and can quit stressing about eating less food. But here’s the weird thing. The weight gain has something to do with breast cancer and not with the drugs. You can give the exact same chemo drugs to a lung cancer patient, and they will lose weight and look emaciated, while a breast cancer patient will gain weight. Isn’t that totally weird?
Wanna know what else is weird? It’s totally possible for spouses to get sympathetic chemo side effects. Hubs has had a weird, metallic taste in his mouth, which is a common side effect. I’ve not had that one, but apparently, he’s having it for me. Poor guy. At least he didn’t get hit with nausea!
So there you have it, a little lesson on ports and a wee update on chemo.
I’ll leave with with a photo of me at my first and second chemo sessions.

Some things never change January 5, 2013
Posted by Judy in Sewing projects.1 comment so far
Growing up, we ate lots and lots of fruits. We had a little rolling cart with 4 baskets that was always full of fruits, and we would go to the grocery store almost daily to get more fruit. I generally didn’t mind all of the fruit, that is, until I turned about 6 or 7. At that point, certain fruits – citrus, apples and grapes – would make me upchuck. My parents, dad especially, would be so annoyed with me and thought that I was puking just to be a recalcitrant child. (As a side note, I can handle most bodily fluids, puke is not one of them. I cannot even fathom doing that just to be obnoxious!!)
Anyway, I remember a time when I was maybe 9ish. Oranges were served and I, of course, complained, knowing what the outcome would be. I ended up losing it in the bathroom sink and my dad was all kinds of mad at me. I’m not sure that I ever convinced my parents that I wasn’t making this up! I eventually learned to just eat the fruit slowly and not think about it too much, and then I would be okay. I still felt mega nauseated, but was able to keep it to myself, so to speak.
When I was about 12, we went to a fall festival and they had a game where apples were dangling from the ceiling from strings. The point was to run up, take a bite out of the apple without touching it with your hands, and then run back and tag a team member. I thought about playing, but then smacked myself in the head and said, “heck, NO!”
It wasn’t until college that I was able to comfortably eat apples. I think I managed to figure out that the mealy ones were the ones that would do me in, so I just made sure to only eat the crispest apples around. Grapes were still out and citrus was a total maybe.
By the time I hit grad school, I was able to eat most fruits about 85% of the time. One time, we were at a friends’ house and oranges were served. This happened to be a time that fell into the 15%, so I steered clear. When asked why, I gave a brief explanation and moved on. A friend was intrigued by this ailment and kept asking questions. He clearly had no idea how cloyed I was feeling about the oranges! After several calm attempts to get him to stop, I lost it and said, “Dude! Unless you want me to puke all over you . . SHUT UP!” He looked a little shocked, and stopped, but I could tell deep down inside he REALLY wanted to get to the bottom of it all!
So, I wasn’t being a recalcitrant child all those years ago. I’m 36 and some fruits can still send me running to the porcelain throne! You might be wondering what brought this to mind? Let’s just say that I won’t be eating any more of those chocolate dipped clementines we had for dessert today! 😀
Kids clothing week challenge follow-up October 31, 2012
Posted by Judy in Musings, Sewing projects.1 comment so far
Okay, I know it’s been 3 weeks since the challenge started, which means it ended two weeks ago. I’m gonna go ahead and cut myself some slack. I had a GIANT list AND I have a newborn (READ: I’m always tired or nursing!) But, I’m pleased to say that I got most of the things on my list crossed off.
Here’s the list with the completed items crossed off. The ones bolded and crossed off are ones that I decided didn’t need to be made.
For DS1
– a winter vest
– a dressy winter coat
– 2-3 long-sleeved shirts
–1 dress shirt
– 5 undershirts
– 2 pajama shirts
– 5-6 pairs of baby legs
For DD
– a winter vest
– 3-4 long-sleeved shirts
– 5 undershirts
– 1 sweater
– 1 dress
– 5-6 pairs of baby legs
For DS2
– honestly, he has so much stuff he doesn’t really NEED anything. But I can’t just leave him out, so I’ll probably make him a long-sleeved shirt or two.
– oh, right, he needs about 5 undershirts
For DS3
– a fall jacket that fits him now (as opposed to the 3-6 month size that is giant on him!)
– 2-4 pairs of pants
So basically I just need to make 2 vests and 2 pajama shirts, and their fall/winter wardrobe is done!
I celebrated today by finally finishing up a nursing shirt whose pieces were all cut out and just waiting to be sewn together. And I started cutting out the pieces for a fleece jacket for myself. I bought the pattern last fall, fitted the pattern, then never got around to making it. I didn’t want fall to disappear again without it getting made. Of course, at this rate, the cut pieces will sit around on my cutting table for a few weeks before getting sewn together! *sigh*
Summer sewing: speed sewing October 8, 2012
Posted by Judy in Sewing projects.add a comment
I’m a slow seamstress. I’d like to think I’m speedy, but really, I”m not. Things always take me so much longer to complete than I think they should. DH is always hearing: “Oh, let me just finish this up real quick. It should take me about 15-20 minutes.” An hour or more later, I emerge from my sewing room with the finished item. I’m realizing that I”m just too meticulous to be a speed sewer, and stuff just takes time.
I did discover, though, that I AM capable of churning things out quickly when I really need to and if I don’t put mass amounts of thought into it. So I present to you, my list of speedy sewing.
DS2 started using a pillow back in the spring. It was actually one of the decorative pillows from our bed that we never used. One night, I got the bee in my bonnet to make him a pillowcase while DH was giving the babes a bath. This project took me 15 minutes from “Oh, I NEED to make him a pillowcase!” to “Ta-da! Here it is!” That includes finding the fabric (the battle is oftentimes won and lost here for me), getting the measurements, cutting and sewing. He loves it!

At the babywearing conference that took place in D.C. this summer, I taught a class on how to make ring slings. In order to brush up on my skills, I made ring slings for each of the babes, using a different shoulder style for each one. I did a hot dog shoulder, a gathered shoulder and a SBP-style pleated shoulder. Ring slings are pretty fast to make if you aren’t doing anything fancy. I made all three slings in an hour and a half, so about 30 minutes per sling.

The night before going to the aforementioned conference, I decided that a HAD to have a little business card holder. I whipped this up in 5 minutes!

That same night, I also HAD to make a carseat protector. DS2 is 26 months old and is still rear-facing. When he gets junk on his shoes, then the back of the car seat gets all dirty and gross. They are leather seats, so they clean up easily, but it just looks bad and is hard on the leather. So I put together a little protector. I made it out of laminated cotton and added some ties to the sides and bottom so that I could tie it to the back of the chair. It took me 30 minutes, with the most time-consuming part being sewing on the ties.

Before it got horribly hot this summer, the babes and I would go to the park rather often and then just stay for lunch. Sandwhiches were the usual fare. I realized that I only had one reusable sandwhich wrapper thing, so the day of a park playdate, I quickly made two more. I made my original one about 3 years ago, and ended up having some trouble getting the velcro properly lined up. I changed the design a bit this time, and it worked much better. These two wrapper things took me about 15 minutes each.

Bathing the babes is DH’s task since his back is in better shape than mine. His knees, however, were taking a beating having to kneel next to the tub. I made a bath mat/knee protector thing for him and now his knees are thanking me. It took me about 30 minutes to put together. You can see pics and read more deets about the mat over on my other blog.
The last item on my speed sewing list are carseat strap covers. I know some people will say you shouldn’t go changing things on the carseats. Generally, I agree. In this case, I was willing to make a change and get rid of the fire resistant strap covers that came with the seat. I figured if I was in an accident bad enough that the fire resistance of the strap covers mattered we’d have much bigger problems. So, DS1 and DD wanted something more colorful, so I made these strap covers for them in about an hour for both sets. I think I need to add a bit more padding, though, so I guess that will add another few minutes to the project.

So there’s my speed sewing list. Next up: general summer stuff for the babes.
Kids clothing week challenge October 8, 2012
Posted by Judy in Sewing projects.2 comments
Every spring and fall, I end up with a biggish list of things that I need to sew for the babes. Generally, everything most things end up getting done in the wee hours of the morning because “Shoot! They don’t have a jacket for tomorrow!” This time, I’d like to be a little more organized. I’ve been slowly switching their summer clothing over to fall/winter, and I’ve been making alterations as needed. I’ve gotten to the point, though, where I just need to bite the bullet and actually churn out a bunch of shirts and other things for them.
Enter: kids clothing week challenge. Over on Meg Freeman’s blog Elsie Marley, she is hosting a challenge this week. This is the first I’ve heard of it, but it looks like she’s been doing it every fall and spring for the past few years. The idea is that you commit to spending an hour each day creating some clothing for your child/ren. This is just the motivation I need! So I’m in!
Here’s my list of things I want to get done:
For DS1
– a winter vest
– a dressy winter coat
– 2-3 long-sleeved shirts
– 1 dress shirt
– 5 undershirts
– 2 pajama shirts
– 5-6 pairs of baby legs
For DD
– a winter vest
– 3-4 long-sleeved shirts
– 5 undershirts
– 1 sweater
– 1 dress
– 5-6 pairs of baby legs
For DS2
– honestly, he has so much stuff he doesn’t really NEED anything. But I can’t just leave him out, so I’ll probably make him a long-sleeved shirt or two.
– oh, right, he needs about 5 undershirts
For DS3
– a fall jacket that fits him now (as opposed to the 3-6 month size that is giant on him!)
– 2-4 pairs of pants
I have pinned several jackets and things for inspriation on my boys and girls boards. Mostly, I’ll just be making up my own patterns. I’ll be using Simplicity 2526 for DS1’s winter coat, and Simplicity 3582 for DS3’s fall jacket.
This is a pretty giant list, so we’ll see if I actually get everything done this week! Wish me luck!
Summer sewing – baby carriers September 23, 2012
Posted by Judy in babywearing, Sewing projects.add a comment
Like many of my babywearing friends, I have many baby carriers. I have 3 that I have purchased, and the rest I have made. It’s a big stash by some standards, but keep in mind that DH and I have been wearing our babes for 5 years, so we’ve accumulated a few carriers in that time.
I go in spurts when making them. I’ll go for 6 or 7 months and not feel the need for something new. Then, someone outgrows a carrier, or I give a carrier away and need to replace, or I need something to use at my babywearing meetings, and so I have to make a bunch of carriers. This summer, I made eight carriers: 1 wrap conversion mei tai, 2 padded to wrap strap mei tais, a Ball Baby Overall mei tai, a wrap conversion podaegi and 3 ring slings and a russian apron.
Let’s start with the least traditional carrier: the Russian apron.
You can read more deets about it on my other blog here. You’ll find more info in the second half of that post. So far, I haven’t had cause to use it, but I’m hoping to get to try it out in the next week or two.
My big thing this summer was experimenting with different features on a meitai. We have tons of them because that is DH’s carrier of choice. But, I learned about wrap conversion mei tais (mei tais made out of woven wraps), and wanted to see what all of the hullabaloo was about. So, I made a few. The first one I made was made out of my favorite DIY woven wrap, which I made out of a tablecloth. As a wrap, it wasn’t function well anymore, and it had shrunk, so it was a weird size. I decided to chop it up and make a meitai. It hasn’t gotten much use at all since I don’t find it particularly comfortable. Maybe I didn’t make the shoulder straps wide enough, or maybe the angle is off. I don’t know, I just don’t love it. I’m keeping it around to try out once #4 is around 12-15, I think that might be the perfect age. It just wasn’t all that great with my then 20 month old.
The next two mei tais were made specifically for the summer. I made the bodies out of mesh to help keep the babes cool. The straps were made from this DIY woven wrap and from a repurposed couch cover. I also made one much bigger so that out 5 year old could ride more comfortably in the carrier. They both have padded shoulder straps that then fan out to wider wrap-style straps. I think the toddler sized one works better, but that’s because the toddler doesn’t weigh as much. DH says that the kindergarten sized carrier sags a bit, and I’m pretty sure that’s due to the mesh. I actually redid the straps for that one and got rid of the wrap-style straps, replacing them with traditional straps. I realize none of this means a hill of beans to most of you, especially without pics. Alas, I’m feeling woefully lazy at the moment, so, no pics! =)

The Ball Baby Overall mei tai is ostensibly a very easy mei tai to make. But, I made it with the help of the babes (I did the cutting and we used their sewing machines), it took considerably longer. It’s actually not too bad comfort-wise given that it has no padding anywhere, it’s just a basic mei tai. If you want to make one for yourself, Jan of Sleeping Baby Productions is hosting the tutorial here on her website.

Since I was in a wrap conversion mode, I thought I’d try a wrap conversion podaegi using a DIY wrap that wasn’t getting much love anymore. I think I used this tutorial mixed with some of my own thoughts. The results: meh . . . . DS2 and I don’t really like it. I think it will likely be great for the new squish, but not so much with the toddler. Every time I go to use it he says, “Mommy, I’m falling! I’m falling!” I don’t think he likes the lack of a waist belt, and it’s just not as supportive as a woven wrap. In any case, I’m keeping it around in hopes that I’ll love it with baby #4.
My very first baby carrier was a Maya Wrap ring sling. I had such a hard time getting it to work, and eventually I redid the shoulder into a gathered shoulder. Once I started having more babywearing meetings, I decided it would be good to redo the shoulder again into an SBP-style shoulder. This pic on Jan’s facebook page is a great example of her pleated shoulder style. So the Maya Wrap got redone for the second time, and it’s a better example sling than before.
The final two slings I made are for myself and DH. For myself, I made a double-layered silk brocade and cotton sling.
I made it with the intention of having something pretty to wear the baby in at church. I think this will definitely fit the bill. And it’s supportive enough that I can wear my 25lb toddler in it now, even at 9 months preggo! DH’s ring sling is made out of fleece with a patchwork accent panel at the bottom. He’s not generally a ring slinger, but I think the babe will be too small to comfortably and quickly use a mei tai. With baby #3, I made him a pouch, but he just never got the hang of it and it was more trouble than it was worth. I’m hoping that the ring sling will be easier for him to use if he needs to quickly get the squish in a carrier so that he can deal with the other babes. You can see pics and more deets on the slings over on my other blog here.
I have a few more carriers I want to make: two hybrid waist meitais for the new squish, a wide blanket podaegi and a chunei carrier. On my 3yo is convinced that she NEEDS an onbu to use with her dolls, so I’m guessing I’ll be making carriers for another month or two, at least!
Summer sewing: bags September 16, 2012
Posted by Judy in Sewing projects.Tags: bags, duffel, purse
add a comment
For some reason, I have made a whole bunch of bags this summer. Seems like every occasion has called for a bag of sorts. Most are still getting used regularly, some, not so much! I have probably blogged about many of the bags over on my other blog: Learning each and every day.

The first bags to get made were messenger bags for the older babes. They had outgrown their toddler backpacks and rather than go with a bigger backpack, I went the messenger bag route. My other blog has more pics and the deets.
The next bag I made was a pool bag. Initially I used it when the babes and I would go swimming at a friend’s house. Now, I use it when I go swim laps in the morning.
In the same vein, I made 3 mini duffel bags for the babes to carry their pool things in. They were super quick to make. I think I made two in about 45 minutes. I have a tutorial for the bags here. The one thing that is now problematic is the tablecloth material I used. It’s not very strong, so it is starting to rip around some of the seams. I haven’t decided if I’m going to bother doing anything out it or not.

This next bag was a fun one to make. It was a bit time-consuming because of the patchwork, but it was still fun. Sadly, it’s not really getting much use. I made it for my 5yo as a little diaper bag where he could keep the stuff that came with his doll. He was all excited about it when it was in the planning stages, very carefully going through my fabric scrap stash and choosing fabrics that he liked. Of course, once it was made, it just sort of sat on his dresser. His excuse: “I’m only going to play with it when me siblings aren’t around so they don’t lose my stuff!” Oh well!
This was a VERY hot summer. As such, the groceries would swelter and melt away in the car if I had to go to more than just the grocery. So, I made an insulated grocery bag. It’s crazy huge!
Just before it got super hot, the babes and I were meeting up with friends at parks several times a week. I would take a lunch, but didn’t have a good way to keep it cool. Enter: the insulated picnic tote.

I recently went on a little trip, and whipped up five bags for the trip: a computer bag, a clutch, two lingerie bags and a shoe bag. I really wanted to finish the duffel bag, but didn’t manage to get it done before zooming off to catch my plane. There are more details about the computer bag and clutch and duffel bag on my other blog. I’m still really loving the computer bag and my little clutch. I”m thinking I’ll make another clutch in a few months for the spring!
The lingerie and shoe bags were super fast to make and I just sort of winged it without a pattern. The little blueish bag with the bow was made from a tea towel. The one with the handle looking thing was made out of the bodice of an old dress. The hole is what used to be arm holes. Mostly, I was looking to reuse the zipper. It turned out sort of weird, but it’s functional. The shoe bag was also made from the same dress . . . that turned out much better.

Two bags that I made were gifts for my parents. I managed to not get a pic of the one I made for my mom. It was just a tiny document type bag. I modeled it after another bag that she had that was less-than-inspiring and not very girly. This cosmetic bag is for my dad. His bag has been around since the beginning of time and is VERY worn. Hopefully he’ll like it! I used brown corduroy for the outside and PUL for the inside. There is a pocket on the outside and also a small inner pocket.

The last bag was a biggie. My purse that I made 4 years ago using this tutorial was getting too small and just worn out. After lots of searching, I decided on making the Amy Butler Blossom Bag. I’ll do another post just on the bag detailing the changes I made and my thoughts. I’m really enjoying using it. It’s the perfect size with just the right amount of pockets and organization for me. I’ll probably only get 2 months of usage since I’ll have to go back to carrying a diaper bag when the new squishy arrives. But for now, I”m enjoying it!
Phew! That was alot of bags! Next up, baby carriers, or maybe speed sewing. Stay tuned!
Summer sewing: an introduction September 15, 2012
Posted by Judy in Musings, Sewing projects.1 comment so far
I lead a very busy life. Part of that is just the nature of the beast – it takes alot of work to run a household and raise three small, active and crazy children. Part of that is self-induced – my list of sewing projects is about a mile long. With all of the cooking, shopping, playdates, occasional cleaning (yes, that does often fall to the bottom of the totem pole), etcetera, I often wonder how I have any time to do anything else! Many a day has gone by in its entirety with me feeling like I’ve gotten nothing done. When several days have gone by without me even getting to set foot in my sewing room, I feel like “Man, I’m so unorganized! I need to get it together!” The truth is, the days I DON’T get to sew are the days I’m busy doing other things. You know, spending time with the babes, trying out great (or not so great) new recipes, doing laundry, going to the grocery store . .. the little stuff=)
Back in June, I was feeling particularly unaccomplished, wondering why I was neither making any headway on the sewing project list nor getting anything done around the house. I decided to sit down and make another list of what sewing projects I’d accomplished from about the end of April up until that point.
I. was. floored. The list was HUGE! And I just kept thinking of more and more things to add to the list. Some were quick projects: business card holder, car seat protector, sandwhich wrap. Others projects took much more time: messenger bags, pool robes and pajamas. After making that list, I suddenly felt MUCH better about my accomplishments. Or better said, I felt accomplished. Apparently, I’m much better at managing my time and getting things done than I thought! Over the next few posts, I’ll be sharing pics and maybe a few tutes of what I’ve created this summer.
I still have days when I feel like I’m getting nothing done. Those are the days when I pull out my list and go, “Oh right, look at all I’ve made this summer.” I’m hoping it will be a good motivator to get me through my ever-burgeoning “Need to make for the fall and winter” list!
Lined mini duffel bag tutorial June 17, 2012
Posted by Judy in Sewing projects, Tutorials.Tags: duffel bag
1 comment so far
We are planning on hitting the pool rather often this summer. To prepare, I made a giant pool bag for myself. Alas, it was too narrow at the bottom, so fitting swimming gear and towels for myself and three babes in it was a challenge. So, I decided to make each of the babes their own mini duffel bag that would contain their swim robe and clothing. I wanted it to be lined so that they could dump their wet suits in there without having them leak all over the truck. I took pictures along the way to share a little tute with you all. It’s a pretty simple project. I used velcro instead of a zipper, which made it quicker to sew.

This is a very mini duffel. The finished width is about 17 inches. It’s just big enough to fit their robes, clothing and shoes, and then it’s stuffed full. But really, the oldest is 5, so they don’t need a giant bag just yet!
Please excuse the low quality photos. My sewing room lighting isn’t great for photography, and my camera is junkola! Also, the pics are from two different bags as I made two at the same time.
What you need:
Outer fabric – choose whatever you or your little one would like
Lining fabric – something waterproof. I used the disposable plastic picnic tablecloths. You could use vinyl or PUL or even laminated cotton.
Velcro
Pieces to cut:
18 1/2 in. x 23in. – cut one each of outer fabric and lining
cut 2 circles each of outer fabric and lining – the diameter should be 7 inches
4 1/2 in. x 38in. – cut one of outer fabric
17 inches of 1 inch wide velcro – cut one each of hook and loop
Let’s get sewing! (Click on the pics to see more detail.)
Seam allowances are 1/2 inch unless otherwise noted.
Making the handles.

1. Take your handle piece and fold the two raw edges in toward the center, hot dog-wise (the long way). Press.
2. Fold it in half. Press.
3. Open it back out so that the raw edges are still folded in to the middle. Place the two short ends right sides together lining up the raw edges. Sew with a 1/4 inch seam allowance. You should now have one connected, continuous piece of fabric. Fold it in half like you did in step two. (Somehow I didn’t get pictures of all of this. Hopefully the explanation makes sense.)
4. Baste it closed.
Sewing the body of the bag

1. Place the lining and outer bag right sides together. Pin the two short sides together and sew.
2. Open out the bag and fold the seam allowance toward the outer bag. Stitch. (This step is optional. No one will actually see this stitching, it just makes it easier to press in the next step.
3. Flip everything so that the outer bag is on the top and the lining is on the bottom. Press the short sides. Be sure to use a pressing cloth so you don’t melt the plastic!

Next you’ll be sewing on the velcro.
-Take one side and fold it to the wrong side 1.5 inches. Press. Place the velcro on the folded part and sew it on. You’ll be sewing through the velcro and two layers of the bag.
-Flip the bag over so that the lining is on the bottom and the newly velcroed section is away from you. Sew the other strip of velcro here.
Attaching the handles

This is the only somewhat tricky part, and only because it involves a bit of measuring and marking.
1. Fold your handle in half and mark the two centers (the upside down pin). Then mark 3 inches to either side of the center. (The other two pins. This is where you will eventually be sewing your x-boxes.)
2. On the bag piece, mark 7 3/4 inches in from the edge on both sides.
3. Now mark 3 1/2 inches down from the short edges (the ones with the velcro sewn onto them). So you should have four spots marked (just ignore all of the pins, I marked more than I ended up needing to mark.) Each pin should be 3 1/2 inches down from the short edge and 7 3/4 inches from the side. Place your handle so that the outer pins are just inside the marks on the body. The center pins should be close to the velcroed side.
4. Sew along both sides of the handle, leaving the portion above the markings unsewn (this is the actual handle portion), and sewing x-boxes at the markings.
Finishing it up

-Pin the circles for the bag and lining right sides together. You should have two sets.
-Serge the edges (or baste together however you’d like).

1. Velcro the bag closed and then flip it inside out.
2. Pin the circles to the ends of the bag, clipping the bag where necessary to get it to fit. Stitch. Undo the velcro and turn the bag right side out.
Sit back and admire your mini lined duffel bag!

